Using in Third-Party Coding Agents
Kimi Code benefits support usage in mainstream Coding Agents — such as Claude Code, Roo Code, OpenCode, and more. It can also work with generic Agent frameworks like OpenClaw and Hermes, allowing you to freely call Kimi Code's AI capabilities in the tools you're already used to.
This document demonstrates the configuration methods for Claude Code and Roo Code.
Before You Start
- Make sure you have subscribed to Kimi membership and activated Kimi Code benefits.
- Obtain an API Key:
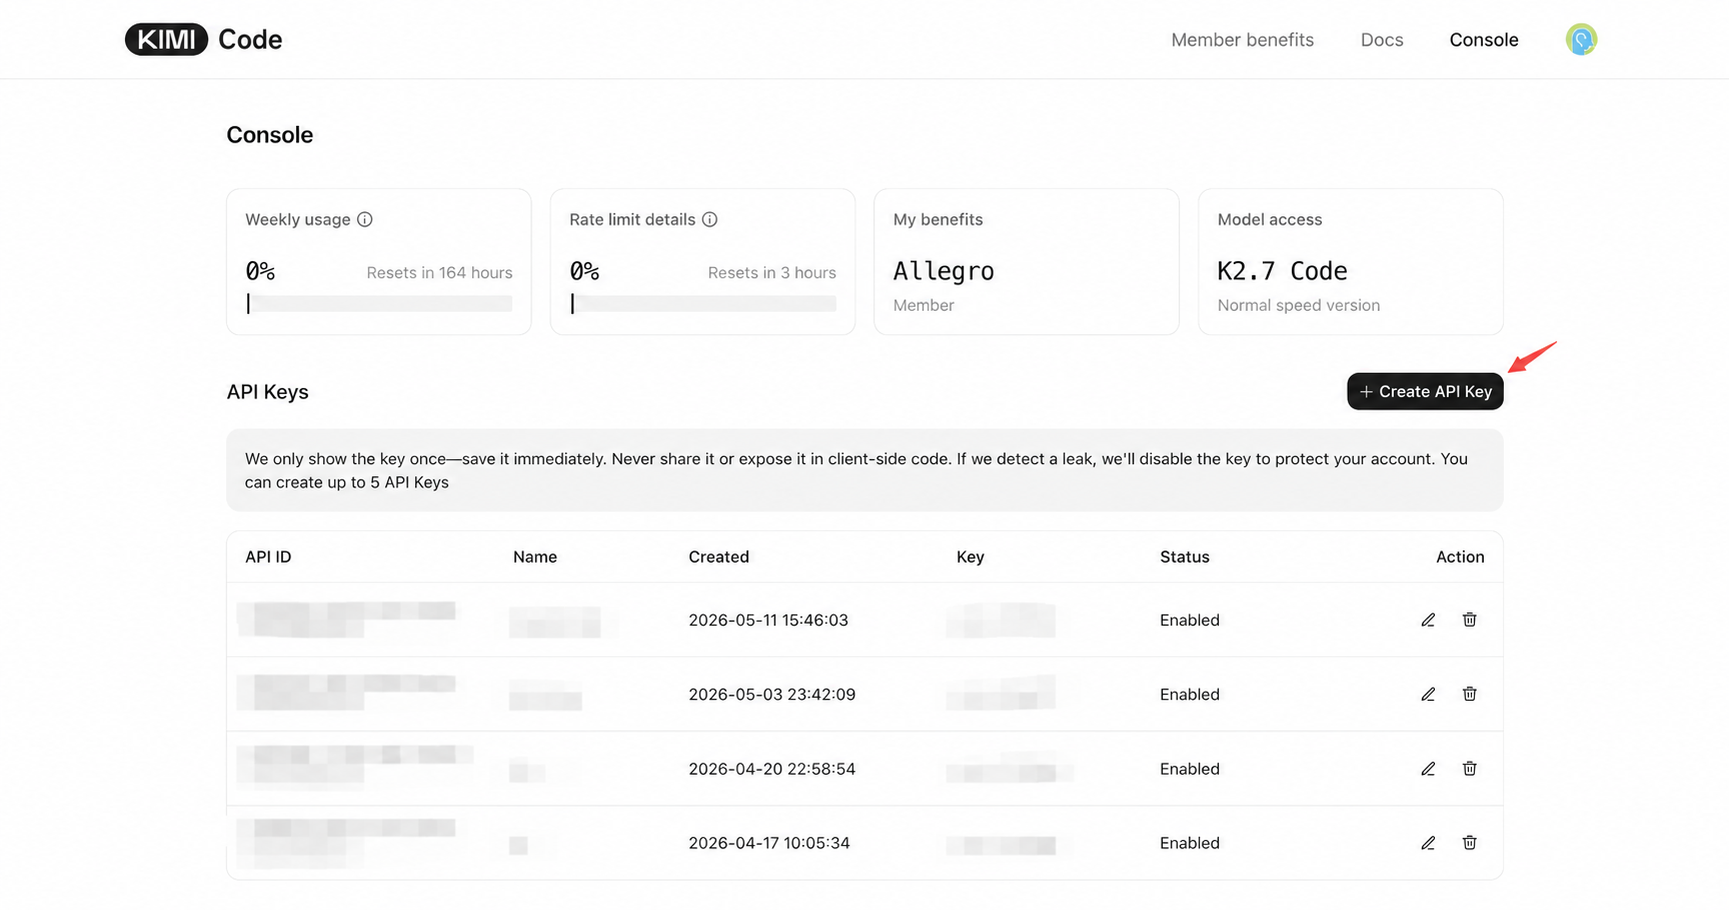
- Go to the Kimi Code Console;
- Click "Create API Key", enter a name and confirm;
- Copy the generated key and keep it safe (the full key cannot be viewed again after closing the dialog).
Claude Code
Claude Code is a command-line programming assistant launched by Anthropic. By configuring environment variables to connect it to Kimi's API endpoint, you can directly call Kimi Code's AI capabilities within Claude Code and enjoy the Kimi Code programming experience in a familiar terminal interface.
① Install Claude Code
For installation instructions, please refer to the Claude Code official documentation.
│
② Run Script to Skip Login
After installation, do not start Claude directly. Execute the following script in the terminal first to skip Anthropic's default login flow:
shnode --eval " const homeDir = os.homedir(); const filePath = path.join(homeDir, '.claude.json'); if (fs.existsSync(filePath)) { const content = JSON.parse(fs.readFileSync(filePath, 'utf-8')); fs.writeFileSync(filePath, JSON.stringify({ ...content, hasCompletedOnboarding: true }, null, 2), 'utf-8'); } else { fs.writeFileSync(filePath, JSON.stringify({ hasCompletedOnboarding: true }), 'utf-8'); }"
│
③ Set Environment Variables and Start
export ANTHROPIC_BASE_URL=https://api.kimi.com/coding/
export ANTHROPIC_API_KEY=Your API Key
export CLAUDE_CODE_AUTO_COMPACT_WINDOW=262144

claude$env:ANTHROPIC_BASE_URL="https://api.kimi.com/coding/"
$env:ANTHROPIC_API_KEY="Your API Key"
$env:CLAUDE_CODE_AUTO_COMPACT_WINDOW="262144"
claudeIf prompted whether to use this API key, confirm to proceed. Afterwards, follow the prompts to select your trusted project folder to complete the authorization.

│
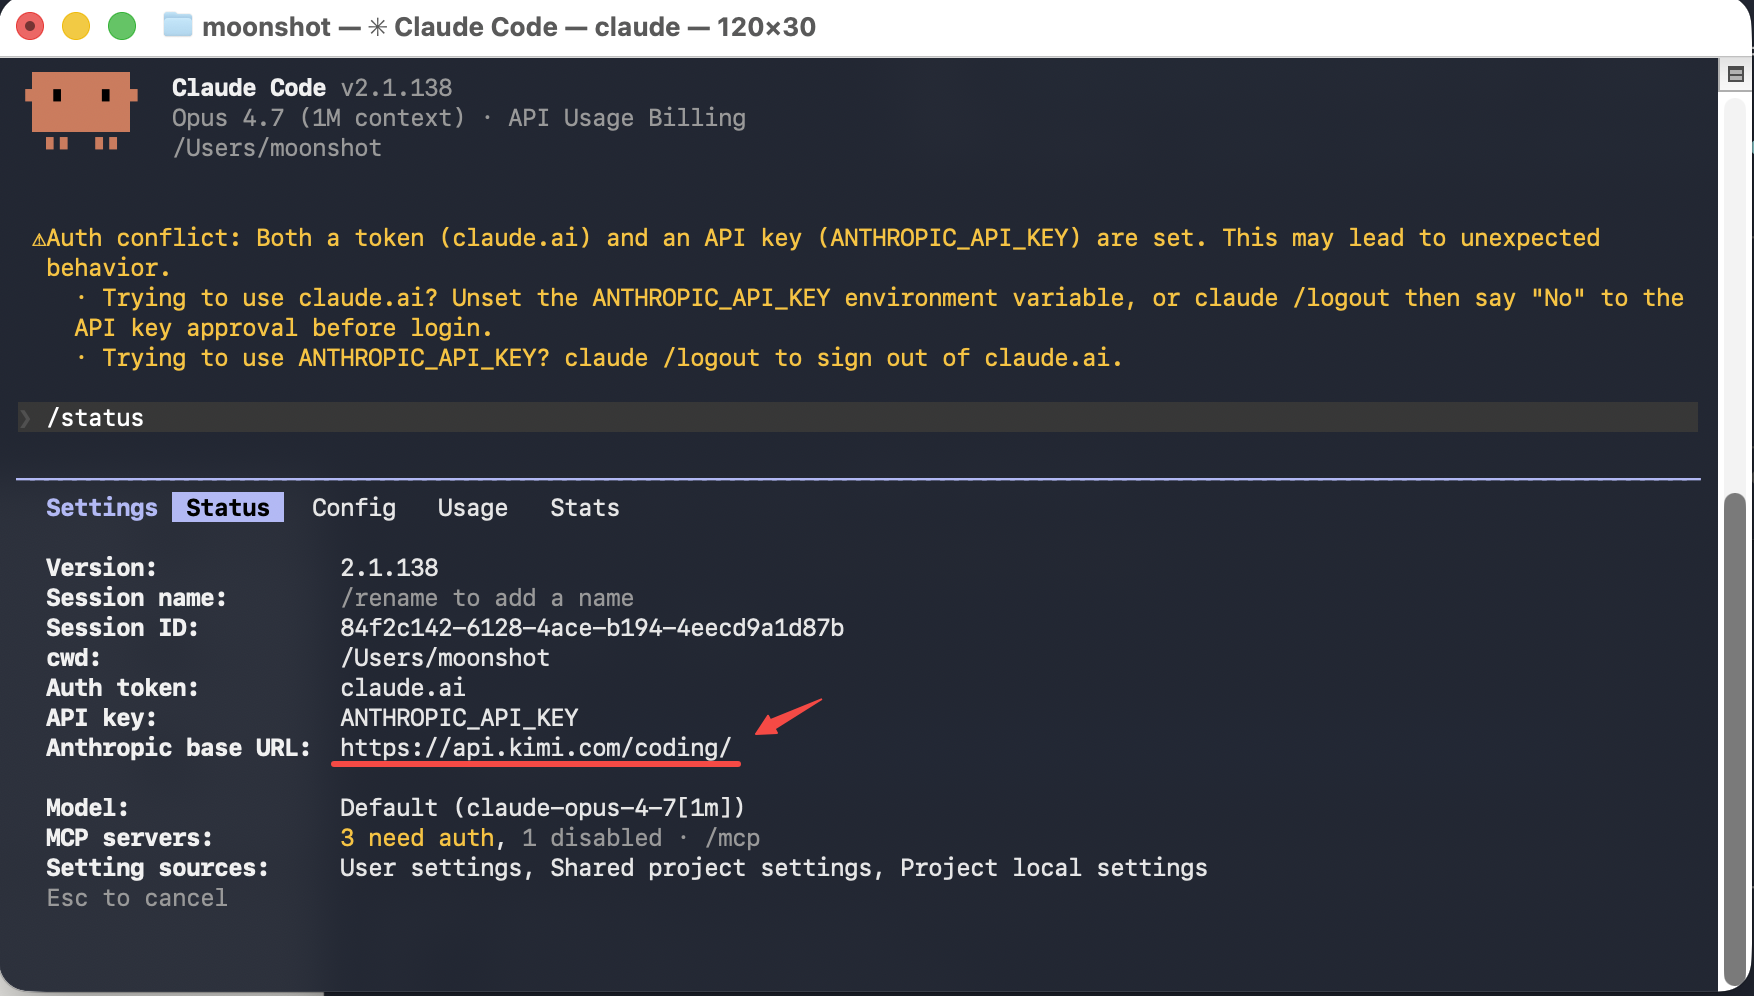
④ Verify After Starting
After starting, enter /status. If the returned information shows Base URL as https://api.kimi.com/coding/, the configuration is successful. Even if the model name still appears as a Claude model, the actual calls are still made to the Kimi Code API.
Note
Calling the latest model, K2.7 Code, requires enabling Thinking mode; otherwise requests are routed to K2.6. The shortcut to enable Thinking — Option+T on macOS, Alt+T on Windows and Linux.
Roo Code
Roo Code is an AI programming plugin for VS Code. By configuring the OpenAI Compatible protocol, you can call Kimi models within Roo Code to complete code generation, refactoring, and multi-file collaboration tasks.
① Install Roo Code
Click Install Roo Code in VS Code.
│
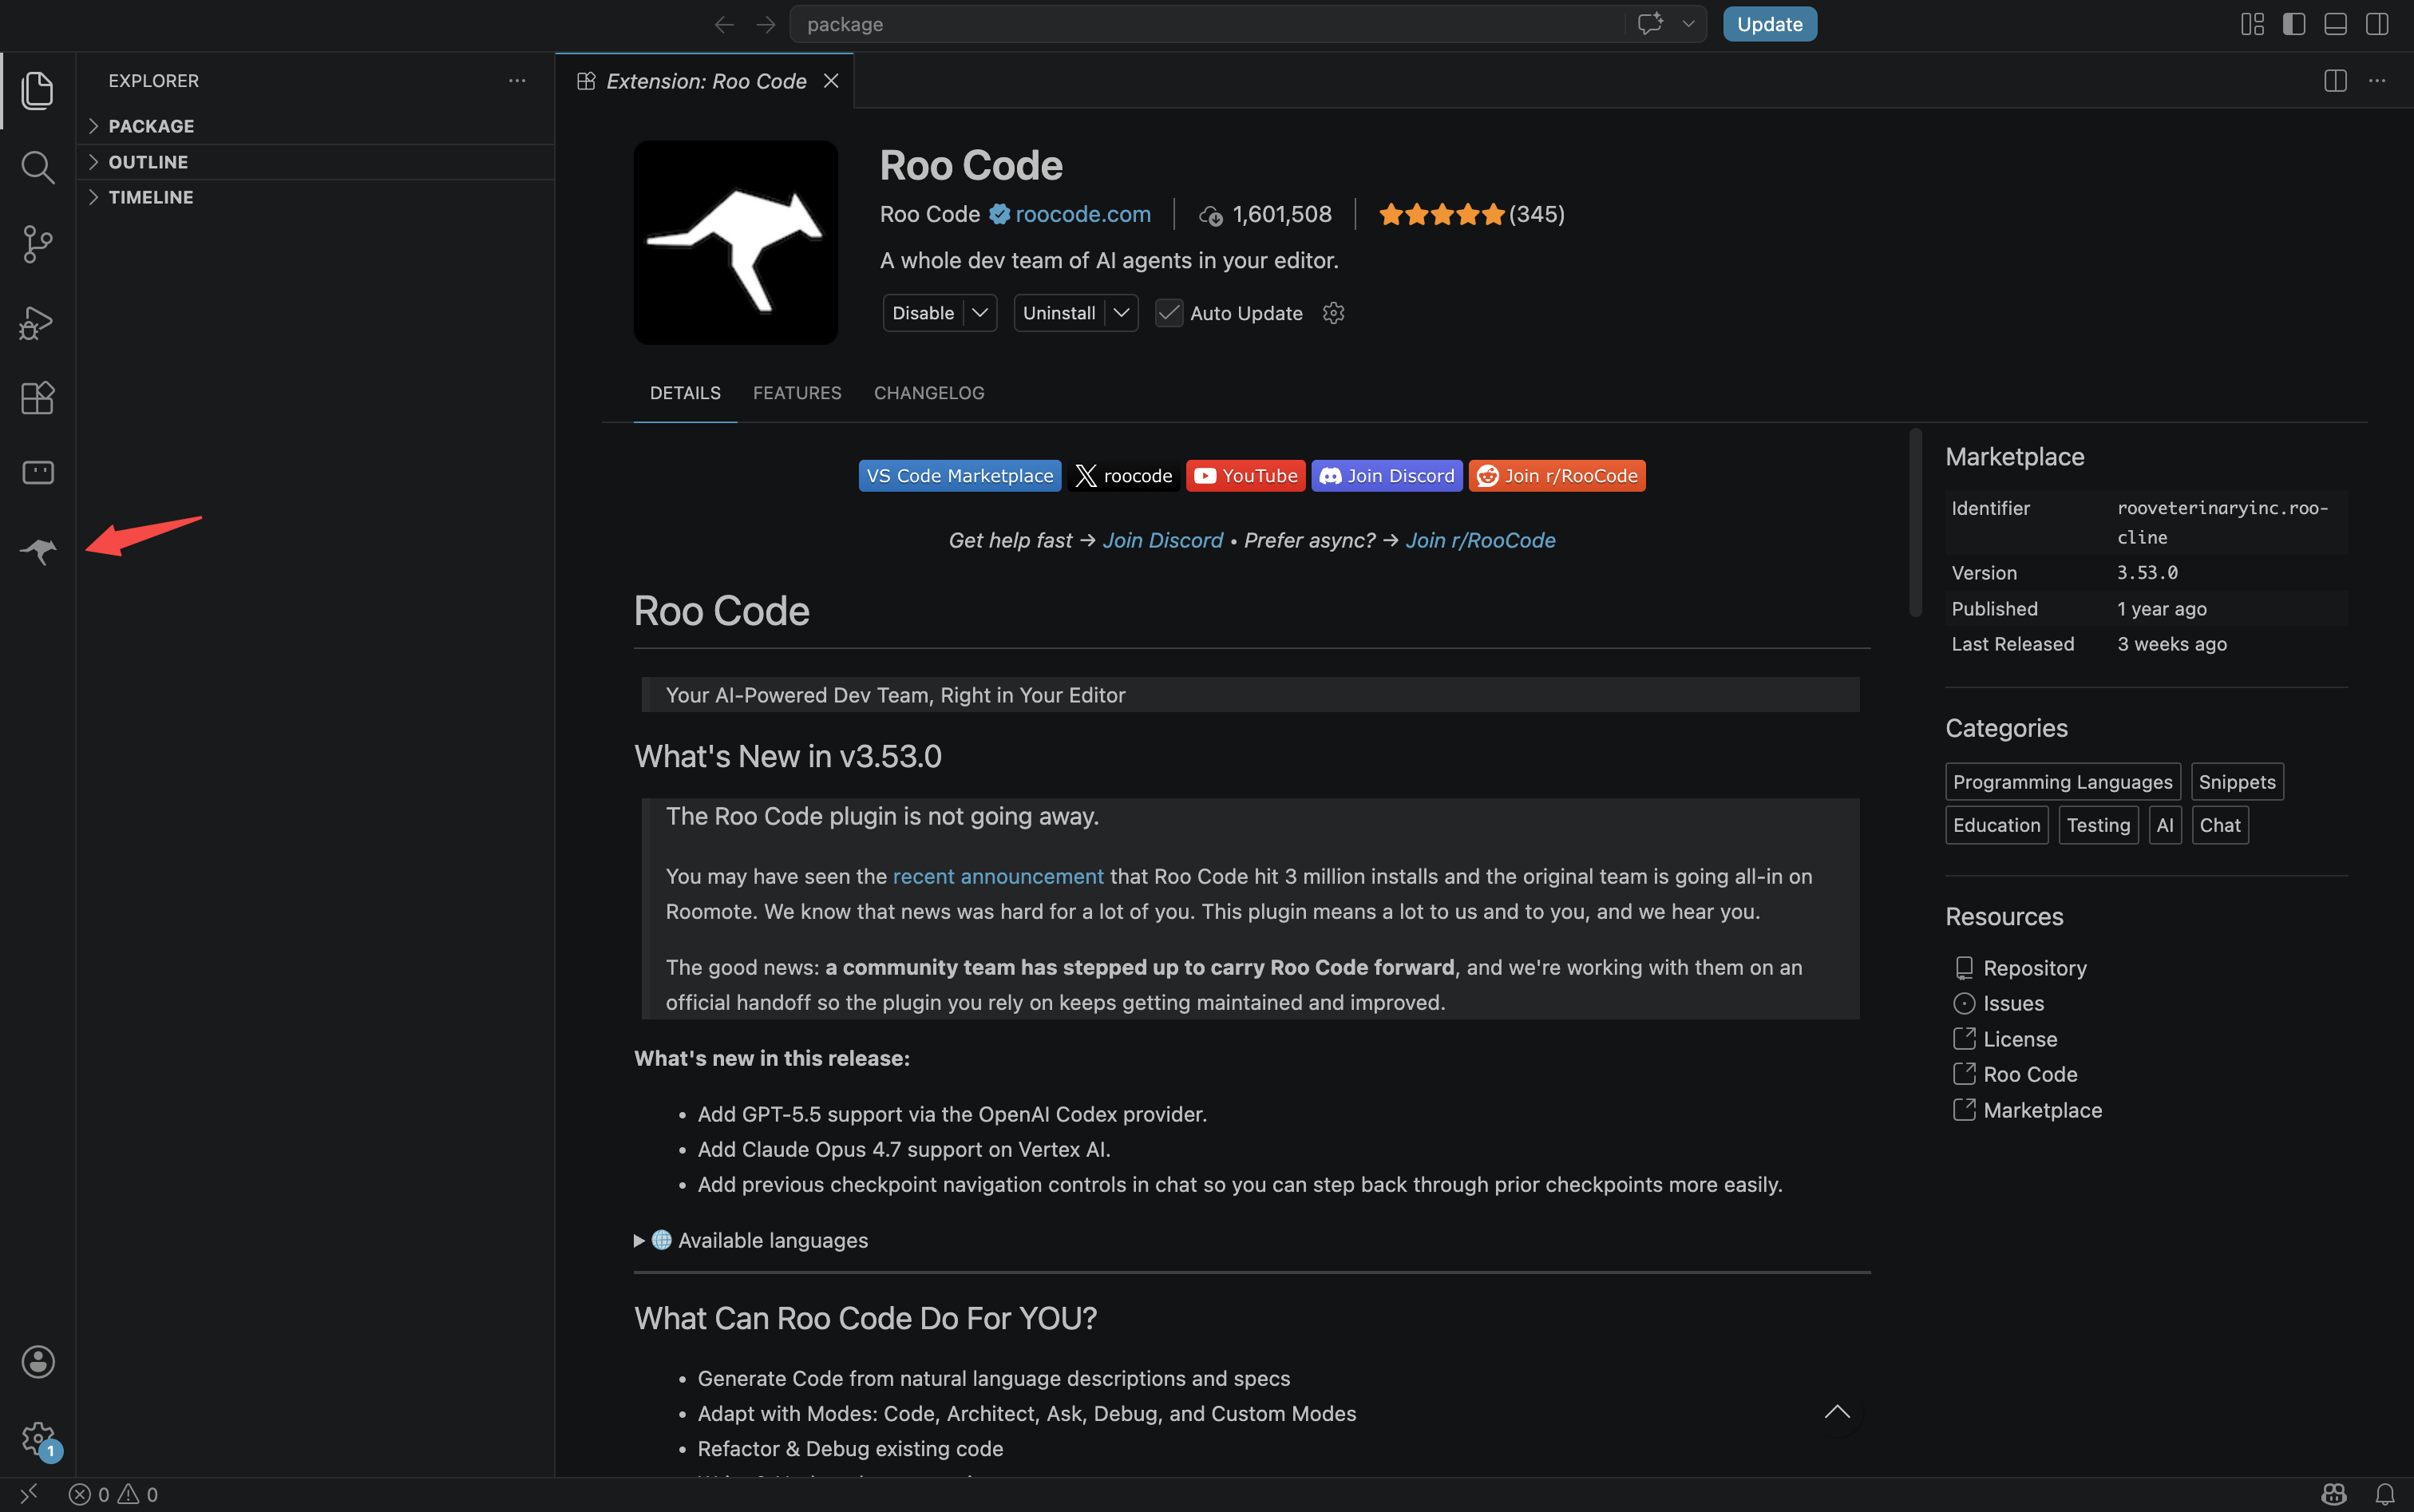
② Open Roo Code from the Sidebar
After installation, click the Roo Code icon (kangaroo) in the VS Code left activity bar to open the panel.
│
③ Configure Kimi Code Model
Open the Roo Code panel and go to the Settings page:
- New users: On first use, directly select "3rd-party Provider" to enter configuration.
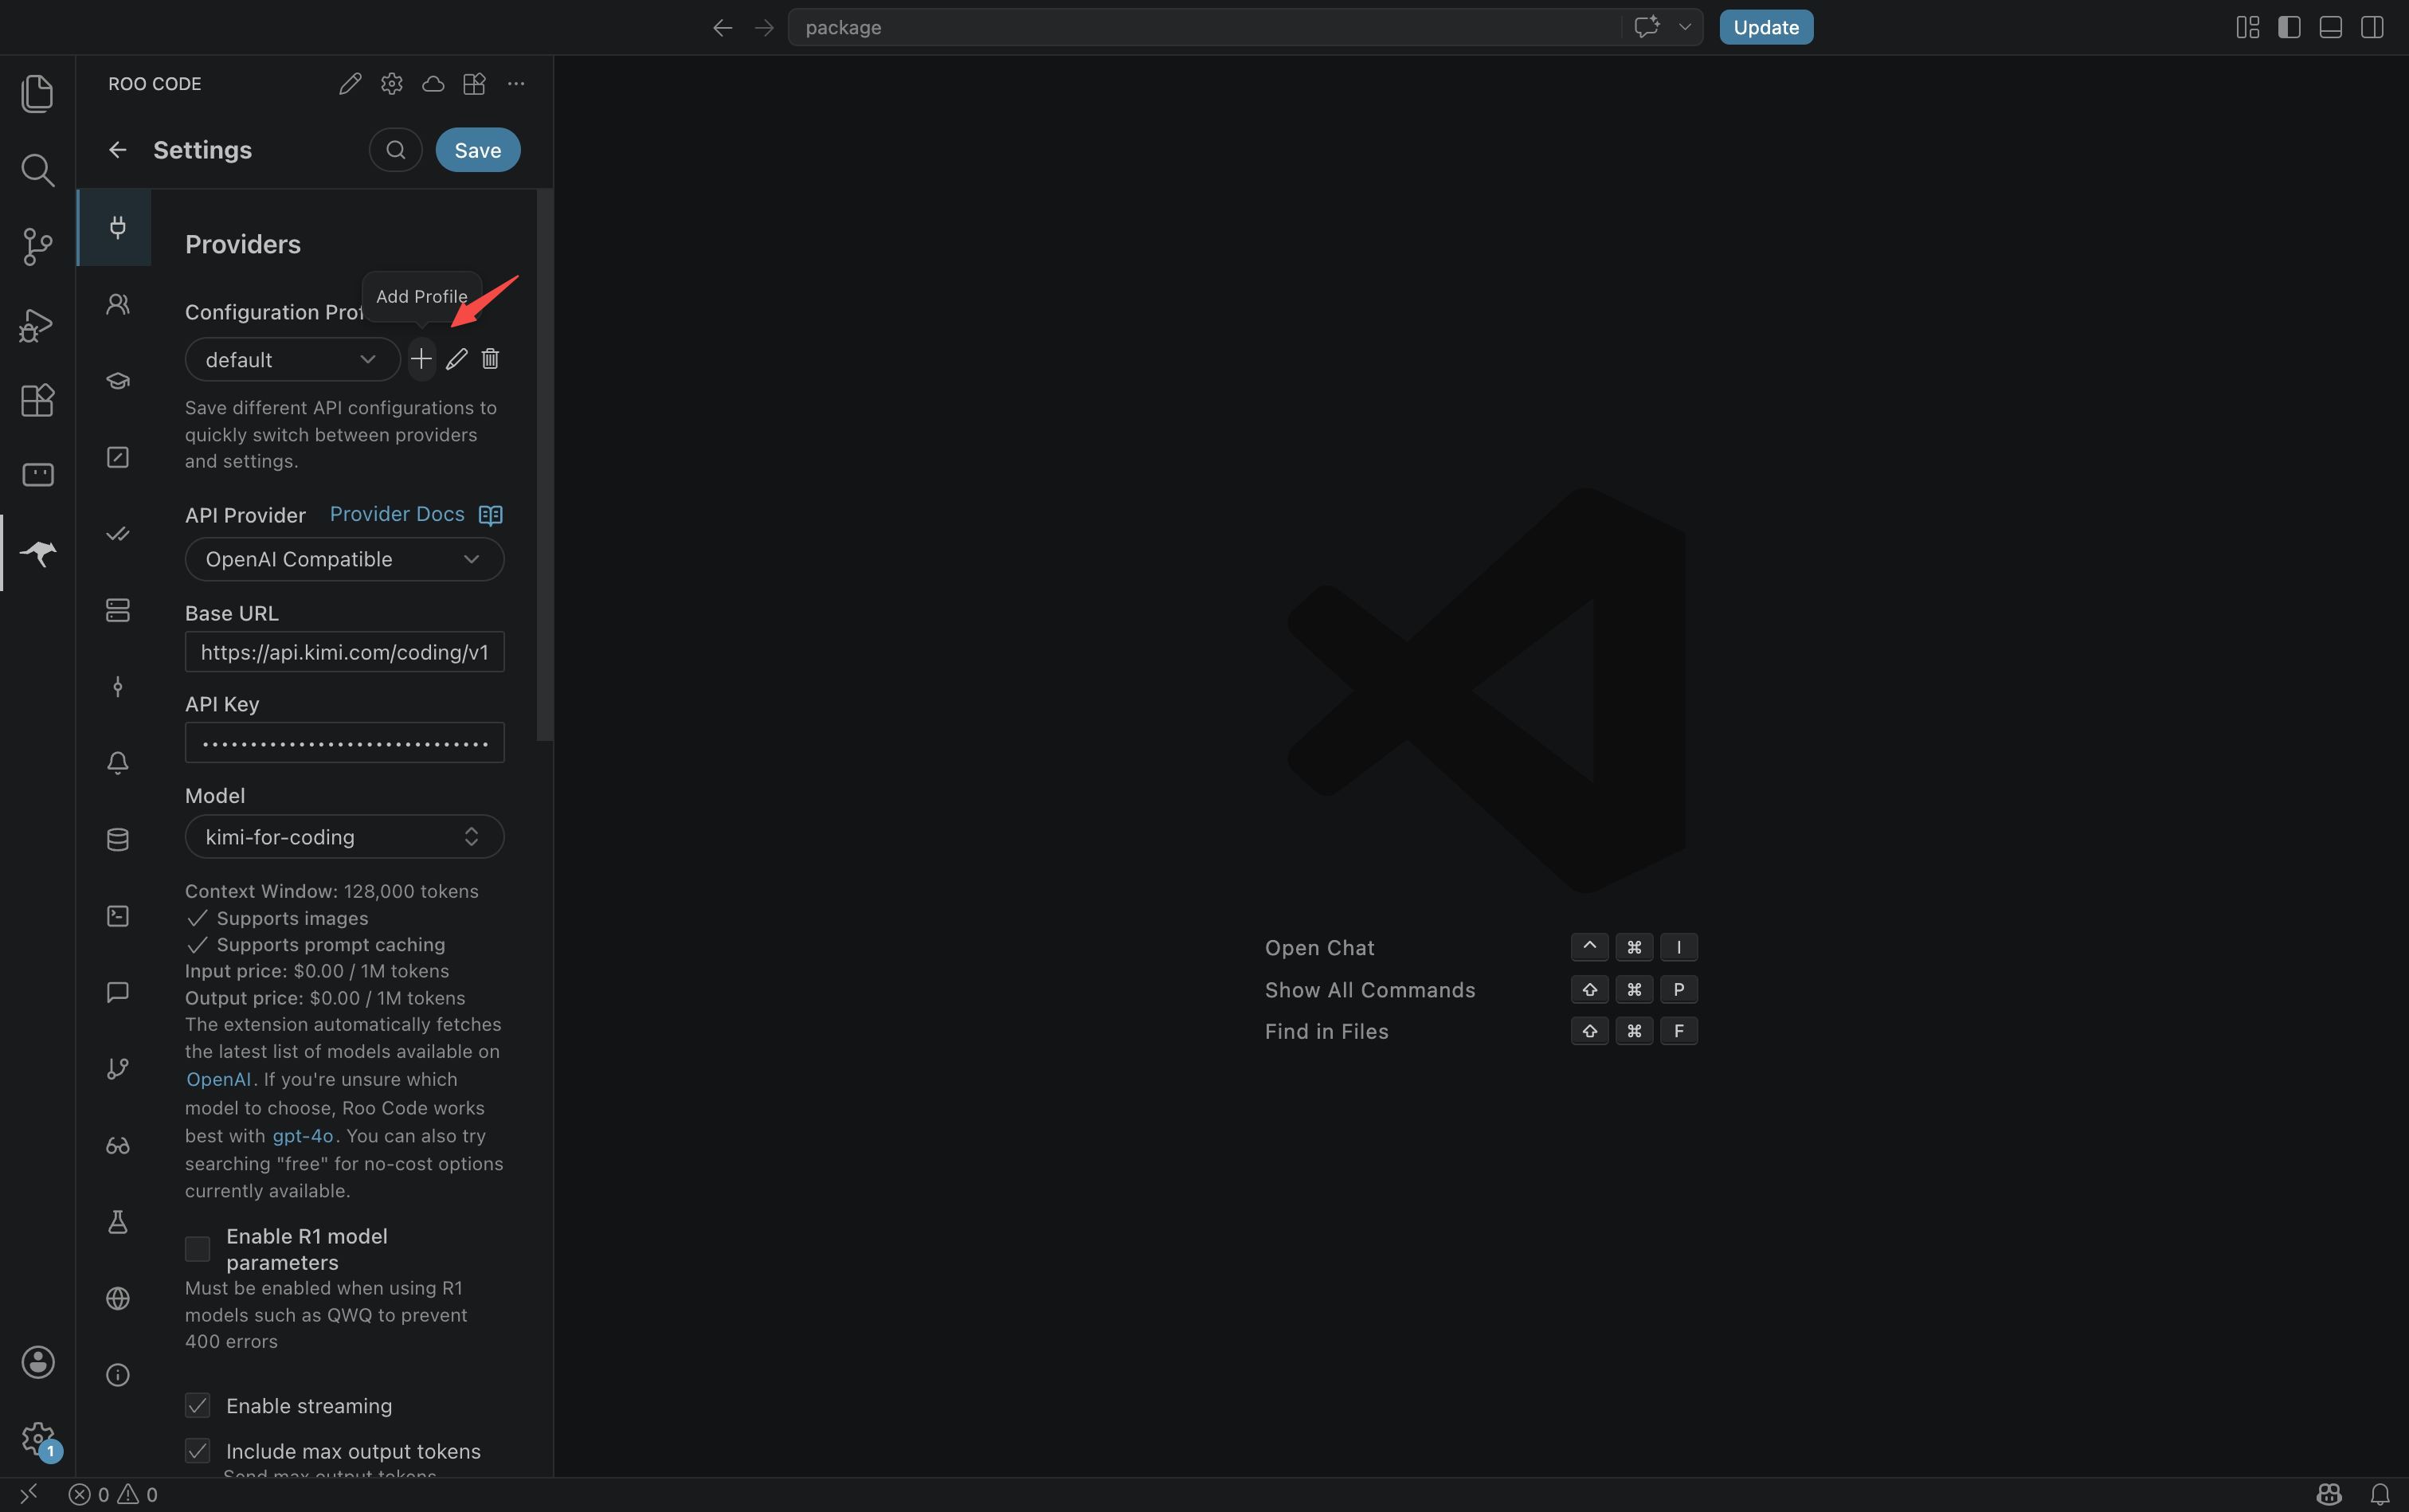
- Existing users: Open the Roo Code panel, go to Settings, and click the 「+」 next to Configuration Profile to add a new configuration.
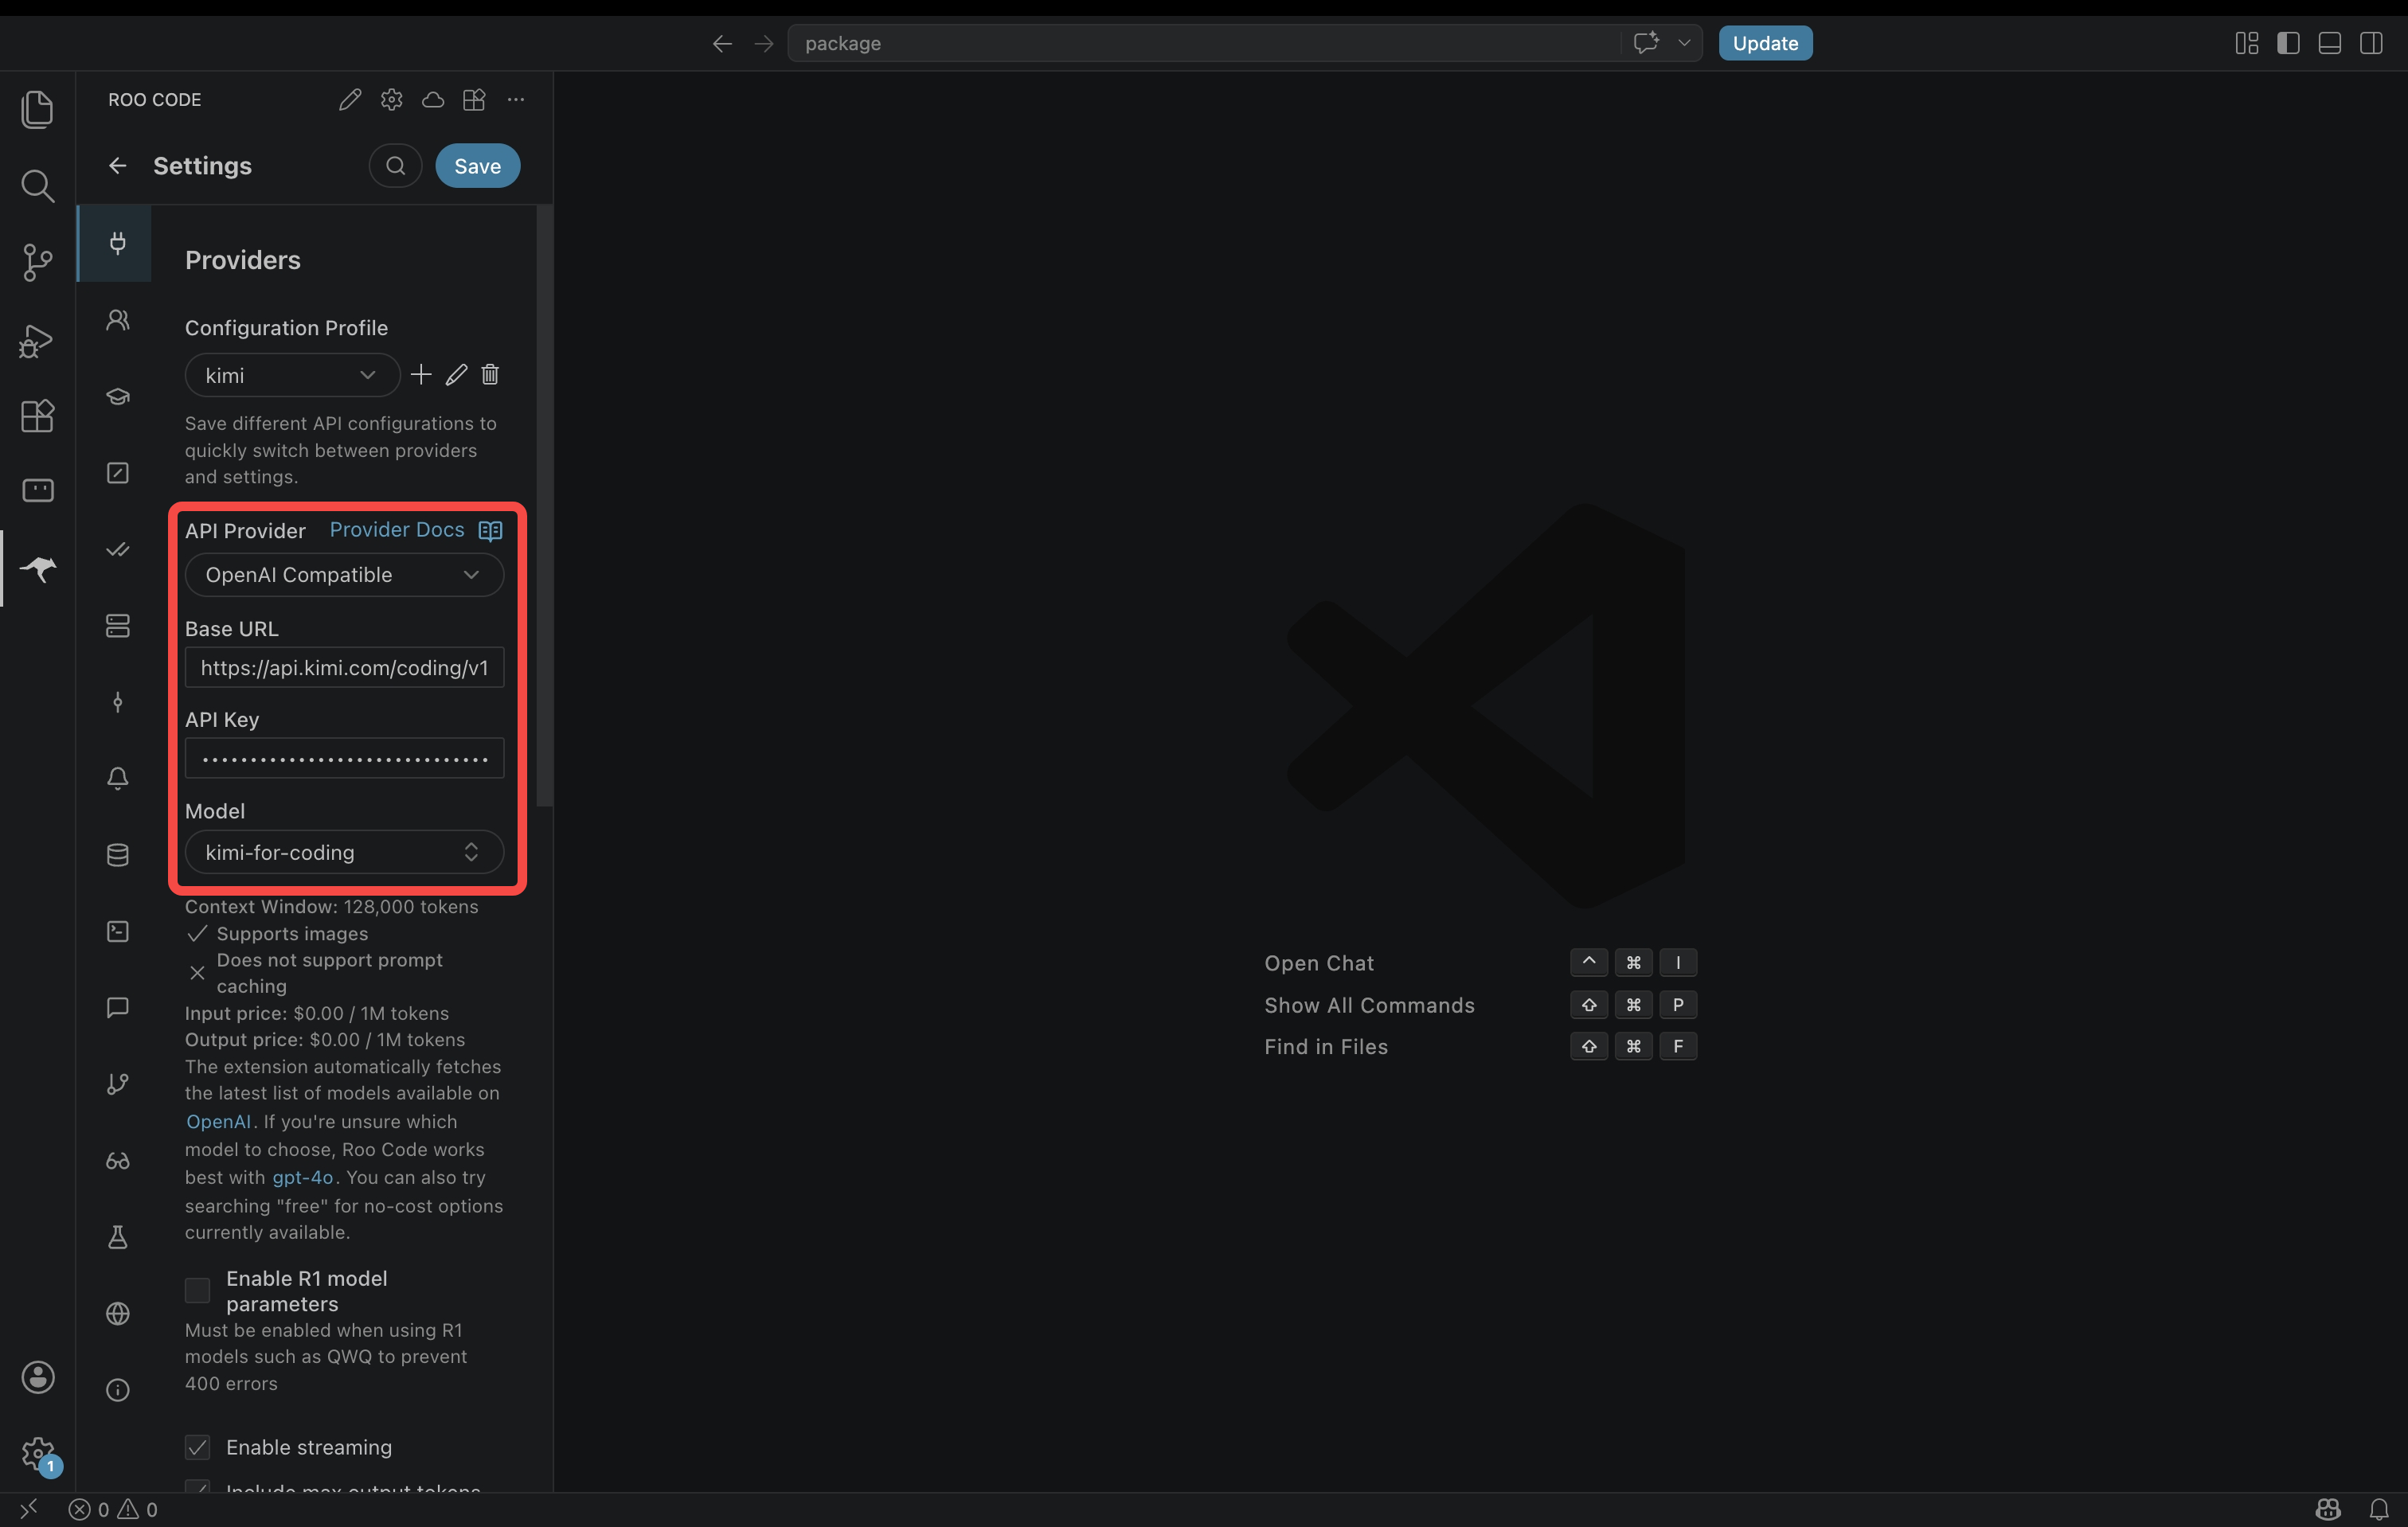
Fill in the model configuration information as follows:
| Configuration Item | Value | Description |
|---|---|---|
| API Provider | OpenAI Compatible | Select third-party compatible provider |
| Base URL | https://api.kimi.com/coding/v1 | Kimi Code API endpoint |
| API Key | Your Kimi Code API Key | Obtained from the console |
| Model ID | kimi-for-coding | Unified model identifier |
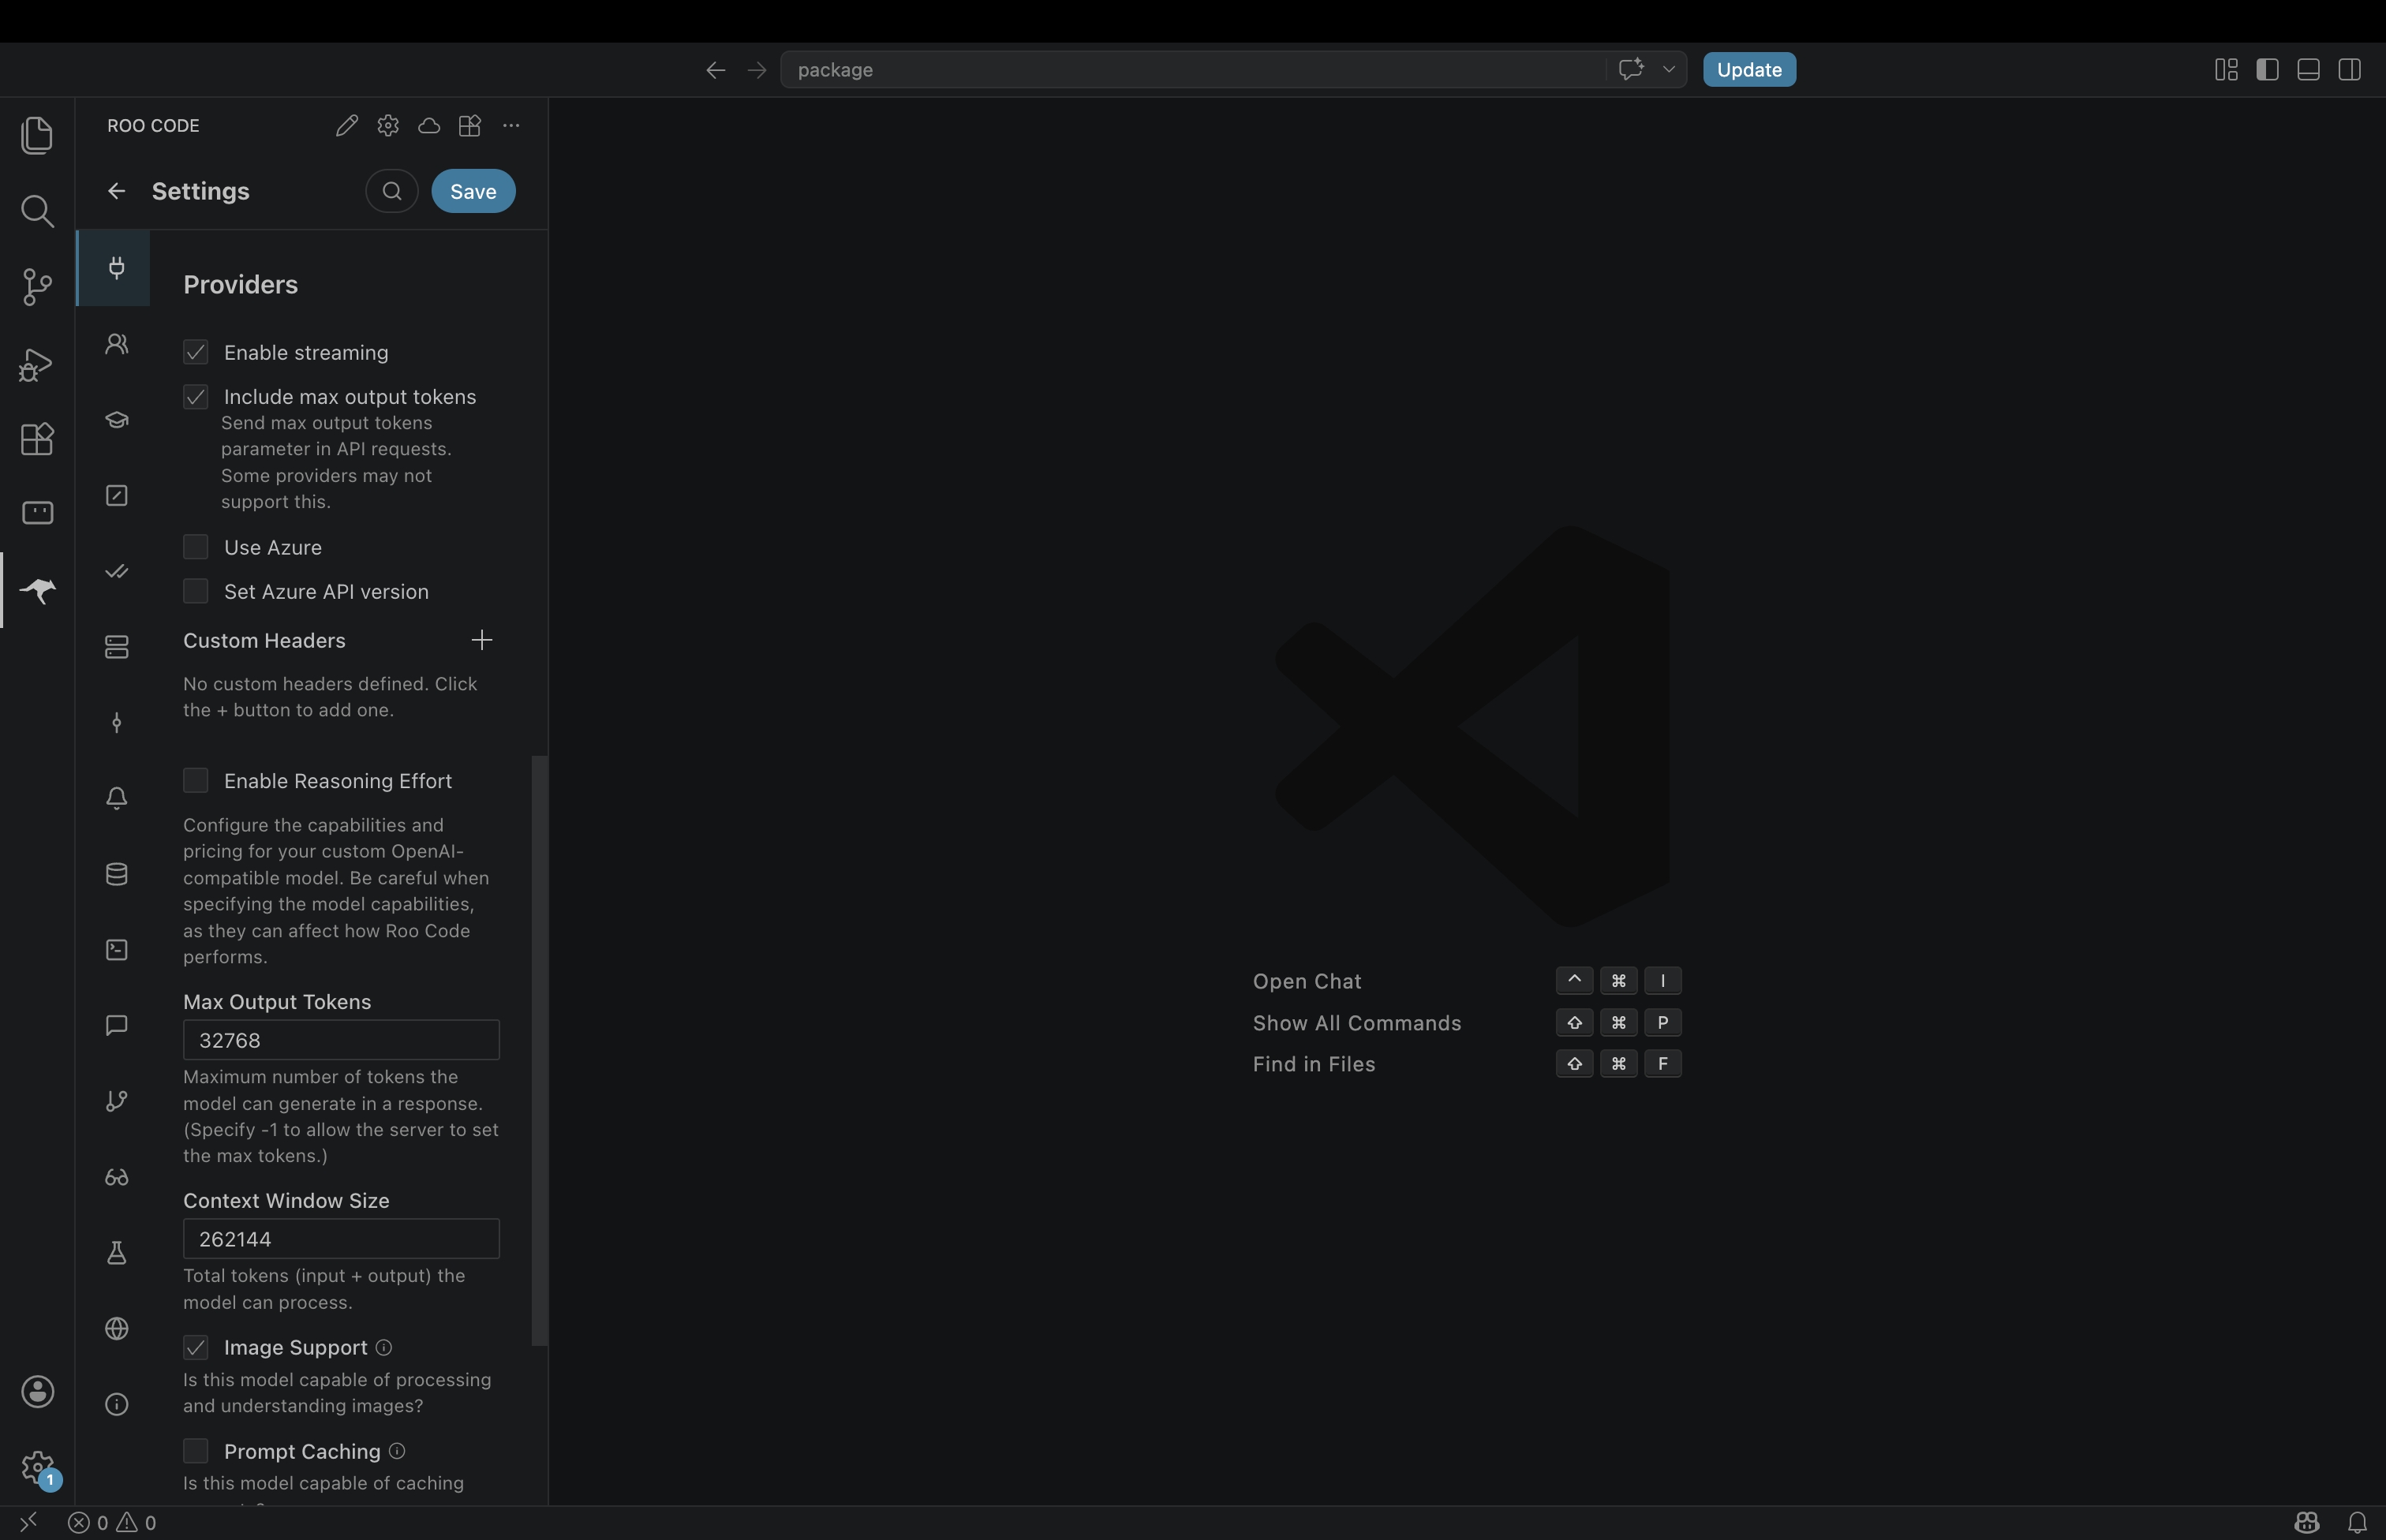
Set the remaining options as follows:
| Option | Value | Description |
|---|---|---|
| Enable streaming | ✓ | Enable streaming output |
| Include max output tokens | ✓ | Include max output token count |
| Enable Reasoning Effort | Medium (Recommended) | Reasoning intensity |
| Max Output Tokens | 32768 | Maximum output token count |
| Context Window Size | 262144 | Context window size |
| Image Support | ✓ | Support image processing |
Max Output Tokens and Context Window Size are used to inform Roo Code of the model's capability range; leaving them blank may lead to truncated output or insufficient context.
│
④ Switch Configuration (Existing Users)
After configuration, existing users need to switch to the newly saved Kimi Code configuration in the Roo Code panel.
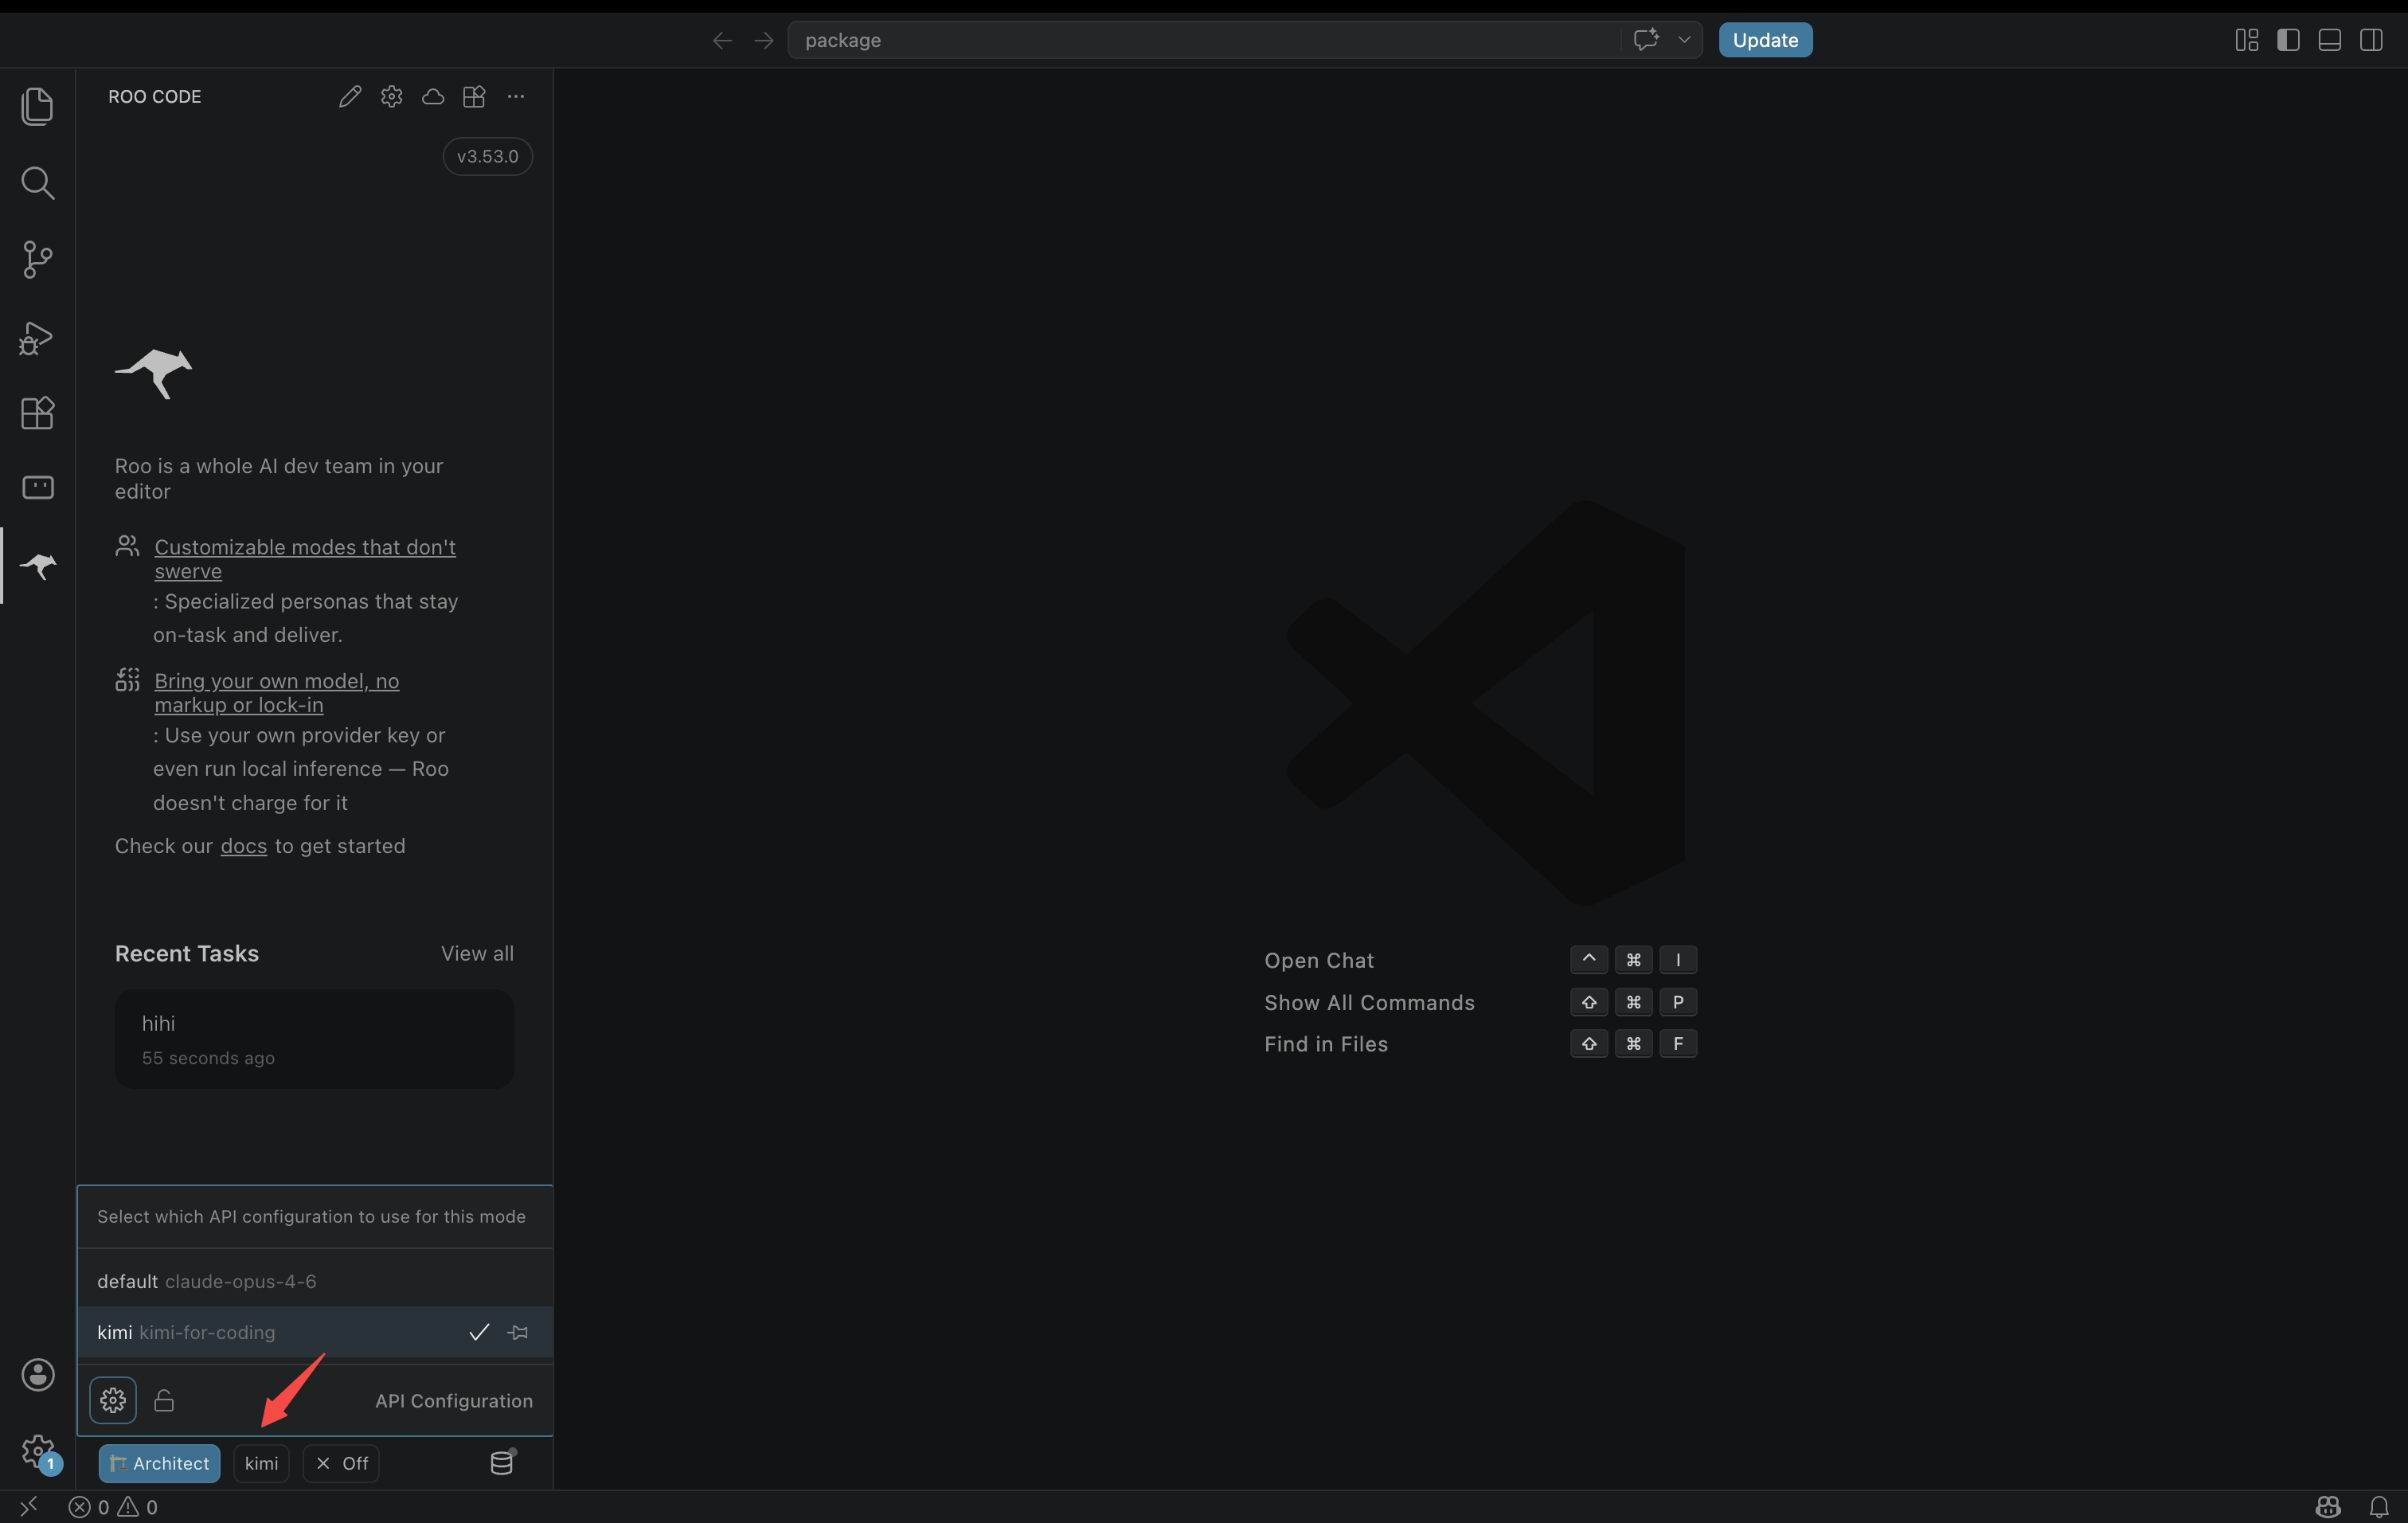
Save the configuration and start a new session to use it.