What is OpenCode?
OpenCode is an open source AI coding agent that runs in the terminal and can also be used through desktop, IDE, and server-based workflows. It helps developers work with a codebase by reading files, explaining structure, editing code, reviewing changes, and running tasks through connected LLM providers. You connect it to a model provider, such as Kimi API, and OpenCode uses that provider to plan, reason, and act inside your development environment.
What can you do with OpenCode?
You can choose OpenCode when you want an AI coding workflow that can work directly with your project. For instance:
Write, edit, and refactor code: You can ask OpenCode to add a feature, modify an existing file, refactor a function, or explain how a module should be changed. For best results, point it to the exact files or directories involved.
Debug errors and generate tests: OpenCode can inspect error output, read the related files, suggest fixes, and add tests. This is especially useful when the failure depends on the project context.
Review code changes: You can use OpenCode to review local changes before committing. It can look for likely bugs, missing tests, inconsistent patterns, and risky edits.
Automate development workflows: OpenCode also supports non-interactive and server-based workflows. For example, you can run a one-off prompt from the command line or start a headless OpenCode server and connect another client or integration to it.
Prerequisites to Configure OpenCode with an LLM API
Before configuring OpenCode with an LLM API, prepare the following:
A working terminal on macOS, Linux, or Windows with WSL recommended.
Node.js, Homebrew, or another supported installation method.
A project folder you can safely test with.
A model provider account.
For OpenCode, keep in mind that provider credentials are sensitive. Do not paste your key into public issues, shared screenshots, source files, or committed configuration.
Step 1: Install OpenCode
The fastest installation method from the official OpenCode docs is the install script. Run this in your terminal:
OpenCode also supports installation through npm, Homebrew, and other commands. If you prefer the desktop version, you can download the version that matches your device.
Step 2: Launch OpenCode
Go to the project you want OpenCode to work on:
Start OpenCode:
If this is your first time using OpenCode in the project, initialize it from inside the TUI:
How to Configure OpenCode with an LLM API
In most cases, using “OpenCode API” means connecting OpenCode to an external LLM provider through an API key. The provider supplies the model, while OpenCode handles the coding-agent workflow inside your project. The following steps use Kimi API as the provider example.
Step 1: Create your Kimi API key
Open Kimi API platform. Create an API key from the console, then store it in a password manager or secret manager. If your console only shows the full key once, copy it before leaving the page.
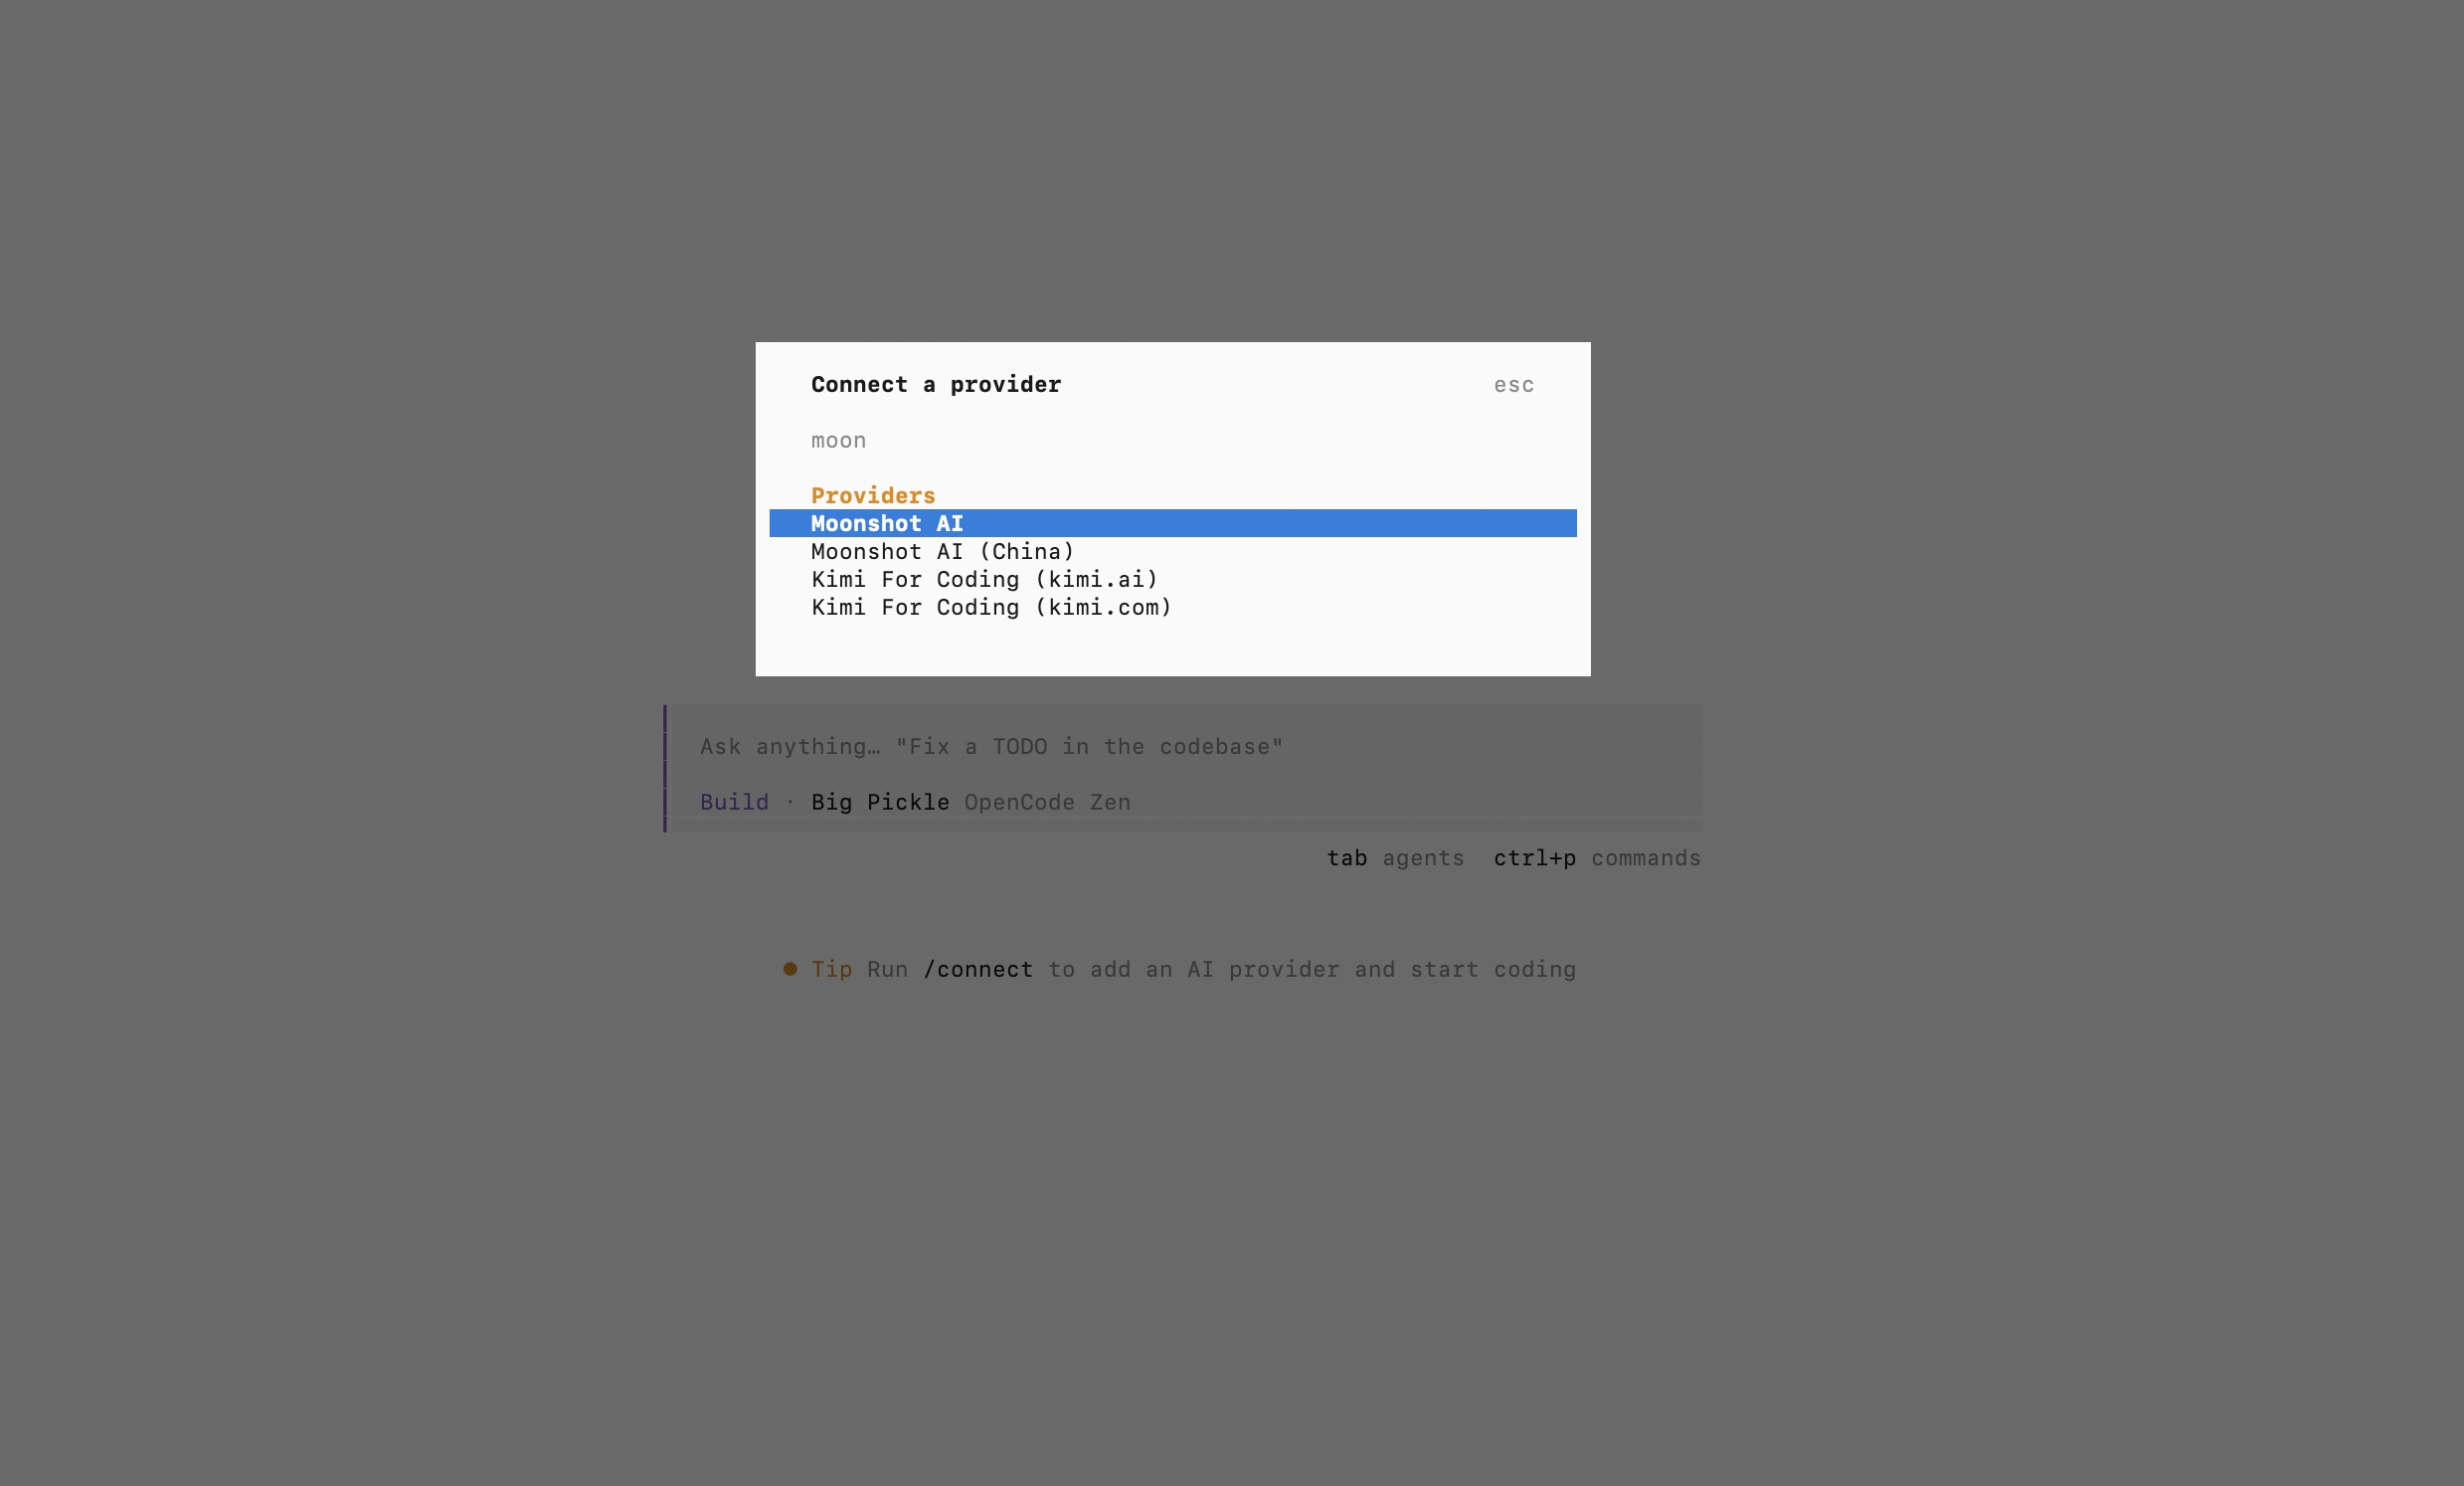
Step 2: Connect a model provider
Launch OpenCode in your project:
Inside the OpenCode interface, run:
Search for Moonshot AI or the Kimi-compatible provider entry shown by your OpenCode version. The official OpenCode provider docs include a Moonshot AI provider flow: create a key in the Moonshot AI console, run /connect, search for Moonshot AI, and enter the API key.
If your version does not list Moonshot AI, update OpenCode and refresh the model list:
Step 3: Enter your Kimi API key
When OpenCode asks for the API key, paste your Kimi API key.
OpenCode stores provider credentials in its local auth file. The official provider docs list this path:
You normally do not need to edit that file manually. Use OpenCode's provider /connect flow instead.
Step 4: Select a Kimi model
After connecting the provider, choose a model from inside OpenCode:
Select the Kimi model you want to use. For new coding-agent workflows, start with:
If you need to run OpenCode non-interactively with a specific model, use the provider/model format shown by your OpenCode model list. For example:
Then use the exact model identifier that OpenCode prints.
Step 5: Run your first coding task
Start with a low-risk task so you can verify that the provider, model, project access, and permissions all work:
Expected result:
Then try a small coding task:
This confirms that OpenCode can read the project and reason over the codebase before you allow it to make changes.
Why Use Kimi API with OpenCode?
Kimi API is a good fit for OpenCode when you want an OpenAI-compatible model provider for coding and agent workflows.
Strong coding and reasoning capability
{{KIMI_MODEL_LATEST_FULL}} is officially positioned for long-horizon coding, instruction following, self-correction, and agent execution. That makes it relevant for OpenCode tasks such as multi-file edits, debugging, refactoring, and review.
Long-context support for larger projects
The official {{KIMI_MODEL_LATEST_FULL}} documentation lists long context support for {{KIMI_MODEL_LATEST_FULL}} and several K2-series models. In an agent workflow, long context can help when the task requires reading multiple files, comparing implementation patterns, or preserving a large amount of task history.
OpenAI-compatible API for easier setup
Kimi API is compatible with the OpenAI API format. For tools that already support OpenAI-style chat completions, this often means you only need to configure the API key, Base URL, and model name.
Flexible use beyond OpenCode
You can use the same Kimi API key in other OpenAI-compatible developer tools, direct scripts, or internal workflows. If you later use OpenCode server or OpenCode SDK, configure Kimi as the model provider first.
Key OpenCode API Settings You Should Know
These settings control most OpenCode API and provider setup issues.
API key
The API key authenticates your request to the model provider. In OpenCode, you usually add it with:
Provider
The provider tells OpenCode where the model comes from. In this guide, the provider is Moonshot AI / Kimi API. Other providers can be configured separately, but each provider needs its own credential and model list.
Base URL
The Base URL is the endpoint used for direct OpenAI-compatible API requests. For Kimi API examples, use the endpoint shown in the current Kimi API documentation or your account console.
Model name
The model name must match the provider exactly. A small typo can cause a model-not-found error.
Common example:
In OpenCode, confirm the provider/model identifier with:
Troubleshooting Common OpenCode API Errors
Most setup issues come from one of five places: credentials, endpoint, provider, model name, or context size.
Authentication failed
Authentication may fail if the API key was pasted incorrectly, deleted, or rotated. It can also happen when the wrong provider is selected, or when the key belongs to a different account or region than the one currently configured in OpenCode.
Fix:
Reconnect the provider and paste a fresh API key. If you use environment variables for direct tests, reset the key:
Invalid endpoint error
An invalid endpoint error usually means OpenCode cannot reach the correct provider endpoint. Common causes include a misspelled Base URL, mixed use of .ai and .cn endpoints across tools, or a proxy or firewall that rewrites requests before they reach the provider.
Fix:
Check the endpoint shown in your current Kimi API docs or console. For direct API tests, use one endpoint consistently:
Model not supported
This error may occur when the model name is misspelled, the selected model is not available for your account, or OpenCode's model list cache is outdated. It can also happen when the provider/model identifier used by OpenCode is different from the raw model name shown in the provider documentation.
Fix:
Then select the model again:
Rate limit exceeded
A rate limit error usually means the provider has received too many requests too quickly. This can happen if multiple agent tasks are running at the same time, or if a script or integration is retrying failed requests too aggressively.
Fix:
Pause the task, reduce parallel runs, and check your provider console for quota or billing status. Avoid writing infinite retry loops around OpenCode or direct Kimi API calls.
Context window overflow
A context window overflow usually means the task is too large for the model to process at once. This can happen if too many files are included, if OpenCode is asked to inspect the entire repository, or if a long session has accumulated too much conversation history.
Fix:
Ask OpenCode to work on a smaller scope:
You can also start a fresh session for a narrower task.
Conclusion
OpenCode can connect your codebase to model providers, run coding tasks from the terminal. Kimi API can provide the model backend for those workflows through an OpenAI-compatible setup. If you want a practical coding agent workflow, create your Kimi API key, connect Moonshot AI in OpenCode, choose a Kimi model, and run a small project task to verify the setup.
FAQ
/connect. OpenCode stores provider credentials locally, and the official docs list ~/.local/share/opencode/auth.json as the credential file path.opencode models. For Kimi API, choose the exact Kimi model identifier shown in your OpenCode model list, such as kimi-k2.6 when it is available for your account./connect.